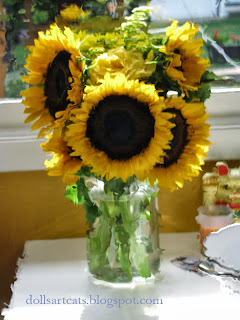
A Displacement Tutorial

Photoshop has a lot of filters that will distort your image so it looks like it has ripples, or brushtrokes. I had never really used Distort much except to bend a plaid pattern over the folds of a scarf. Here's how it works with a photo and a pattern:
You take this bad blurry photo of some sunflowers, and you go to Select>Select All, then to Filter>Distort>Displace:
Then you will get a window asking you how many pixels you want to move horizontally and vertically:
Then photoshop will open a window so you can browse to your "displacement map". This can be any image, as long as it isn't too large, is in .psd format, and is in Grayscale mode. Then you apply it and you get something like the first photo.
I was curious to see what would happen if I painted a custom displacement map, so I re-opened the sunflowers, copied and pasted it into a new file. On this new file I turned down the opacity of the photo layer to 60%, filled the background layer with a 40% gray,and then started painting with black and white.
When I was done, I saved just the black and white painted layer as a grayscale .psd, reopened the sunflower photo, and applied the new displacement map
Haha that is pretty intense, so I went to Edit>Fade Displacement and cranked it down a little. (You can "fade" any filter, it's really useful if you need to add "noise" to something painted to match the photo you are retouching, because the Noise filter is almost always stronger than the noise in the photo.)
The I just goofed around looking at the Channels in the Layers palette, and copied and pasted the Red layer on top of the displaced photo,ran the Watercolor filter over it and then used Multiply as the Layer Mode, and then went back and smudged the wobbly base of the vase by hand.
It looks ok, but I sort of prefer the spiky weirdness of just the custom displacement map with the photo:
The real usefulness of this is that I will make a custom displacement map to "rough up" painted landcapes so I can get better distant leaves and terrain without having to nertle by hand for hours; the next cover I have to do has a lot of landscape in the back.


Thank you for the tutorial post! This would be wonderful to try making images for fabric on Spoonflower with!
ReplyDeleteI pretend Spoonflower doesn't exist or they would clean me out of money. Art+custom fabric, oh my! And you are welcome!
Delete